Pet photography requires a certain set of skills, patience, and a never-ending supply of treats. Knowing how to photograph your pets is a useful skill that will come in handy throughout your whole life, not to mention a great way to refine your photography skills in general. After all, animals only require payment in treats and pats! So, whether you want to take some new snaps for your dog’s Instagram account or you’re looking to become a fully-fledged pet photographer, we’ll give you our best pet photography tips to help you refine your skills so you end up with some adorable pet photos.
Our top pet photography tips
If you’re just getting started or want to brush up on your skills, read on for our top pet photography tips.
1. Setting the scene
Pet photography should be well-considered. That includes finely-tuning the scene and setting. Rather than just snapping away in your home, think about the scene in the background. When working indoors, ensure the space is tidy, and there is no erroneous clutter in the background that isn’t related to the scene you’re trying to create. This morning’s workout gear is only going to detract from your scene.
Consider props like you would any other shoot. For instance, a toy can set the mood for play in an action shot with a dog, as well as being a helpful tool to guide your pup into certain poses, while a blanket, bed, or bone will set a different mood.
2. Getting equipped for pet photography
Depending on what photography skill level you’re at, the equipment you need for pet photography may be similar to the equipment you use for other kinds of photography.
There is no best camera for pet photography, as it depends whether you need to focus on action shots as opposed to portrait-style shots. Any recent DSLR or mirrorless camera will do; the key differentiating factor will be your lens. You’ll need a lens with a fast shutter speed to ensure that you capture the movements of the animals. Use a shutter speed of at least 1/250 if possible, and even faster for action shots. Using continuous autofocus will also ensure you can keep shooting without readjusting your camera. Burst mode will then help you capture all the movements in a sequence.
Telephoto lenses can be extremely useful when it comes to action shots. If your pet is particularly active or playing outside, a telephoto lens will help you photograph subjects in the distance easily. This also helps when you’re photographing shy pets, as you won’t need to disturb the animal while shooting.
It’s also worth investing in a large memory card or two, to store all your images, as you’ll be taking a lot that you probably won’t use! Ideally, you’ll also want to shoot in RAW, as this will give you more freedom in the editing process later. RAW files take up much more room on your memory card, so you’ll need to have decent memory storage to accommodate this. As well as this, you’ll need additional batteries, as you’ll be taking a lot of photos.
If you’re serious about getting into pet photography, you may also want to invest in lens cleaning supplies. As you can imagine, a curious pet will often come up to the lens of the camera, so you’ll need to ensure you have adequate lens cleaning supplies to remove dirt, fur and drool in between shooting. Most pet photography happens outside, so there’s also a chance that there will be excess dirt which can lodge itself in and around your camera and lens.
3. Lighting
When you’re shooting pets, natural locations and lighting is generally best. Not only are the pets in their natural environment, but it will be much easier to achieve good lighting. It can be difficult shooting pets in a studio environment, as they often move around a lot, which means you need to keep changing the direction of your camera and the setup of your equipment. All this can be very time consuming and can make your shoot much more difficult. Lights can also frighten animals, making them much more difficult to work with.
If you do you need to work within a studio environment, you can use diffuser lights or studio lights which create a softer look, and won’t scare the animals. If an animal has a bad experience while shooting in a studio environment, it will be very difficult to get to your pet to do it again next time.
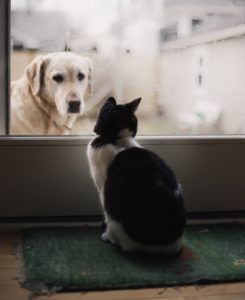
Shooting with cats can be difficult, as most of them spend time indoors, but if you do need to shoot inside, try to do it on a sunny day and shoot near a large window, or on a balcony. Windows can create a nice soft light without the yellow tinge of artificial overhead lights, and cats look natural sitting in a window frame. However, if the light is too bright coming in from the window this can create harsh shadows, so you’ll need to time your shoot well, and pick a window with the best lights.
4. Give your pet some motivation
Treats and toys are crucial when shooting with pets. Not only are treats and toys a great way to direct an animal’s attention the way you want, but they also ensure that your animals have a positive experience during the shoot. With treats, you’ll have more time to shoot before your pets get bored and unless you go overboard with the treats, you’ll be able to capture their attention for the camera.
Toys can be used both as a means of directing your pet’s attention as well as a prop within action shots. If you have a more active dog or you’re looking to take action shots, you’ll definitely need a helper during the shoot. Food won’t work with all animals, however. Some animals respond better to certain toys. If you’re not shooting with your own pets, you need to ask the pet owners what their pets respond to, whether that is a certain type of food or a specific toy.
Some pets respond best to affection, so it’s worthwhile knowing what they prefer. Some animals love belly rubs, for instance, whereas others hate them. Try to continue to reward your animals throughout the shoot to keep them focused and content.
5. Make sure the pet is comfortable
At the end of the day, your pets won’t understand what you’re trying to achieve when you are conducting your shoot. This means that they are inevitably going to get bored if the shoot runs for too long unless your shoot is a very active one. If you’re shooting inside, ensure you have all your equipment set up and ready to go before you get your animals into place. Careful prior planning will ensure that you don’t waste any time on your shoot or miss important shots.
When your pet is comfortable, you’re more likely to achieve shots that truly capture your pets’ character and personality. To ensure they are comfortable, get them doing what they love to do. For example, if your pet is generally very active, taking to the park before or during your shoot to allow him to relax.
6. Find a helper
Whether or not you need a helper will depend on what kind of pets you’re dealing with. For instance, a large dog may take more time and effort to shoot than a calm cat. If you’re shooting with more than one animal, you’ll probably need a helper. If you don’t know the animal, it can definitely help to have an assistant.
An assistant can ensure that the animal is in place before you shoot, so you don’t need to do two things at once. Unlike other types of photography, pet photography requires carrying a lot of equipment so an assistant can help with this too. Unless you’re working with your own pets at home, you will probably find it very difficult to shoot without an assistant.
Many pets tend to feel more comfortable with their owners, so if you have a particularly anxious pet, you may want to suggest that the owner accompanies you on the shoot. Taking photos of the pet interacting with their owner/s can also be a beautiful way to capture them.
7. Plan your shoot beforehand
The more prepared you are for your shoot, the better. Go into your shoot with a clear vision of what you want to achieve. You might even have a shot list with multiple ideas for your shots.
If you’re shooting someone else’s pets, find out what they want to achieve. Our pets experience so many moods in one day, and your vision may be quite different from what the owner expects from your photos. For instance, a cat might have many different personalities. He might be cuddly and affectionate one moment, yet inquisitive and playful the next. The owner may even simply want a more posed photo of their pet sitting obediently. You’ll need to agree on a clear brief prior to shooting.
Most pet owners will want images of their pets which express their personalities. If their cat is playful, ideally, you want to try to catch that within your shoot. If you’re looking to start working professionally, started getting into the habit of building a clear brief, with inspiration and photos to further define what you want the final product to look like. You might even need to build a Pinterest board for each shoot you do.
8. Be calm and relaxed
Your manner during the shoot will dictate how your animal acts, especially if you’re shooting your own pets. If you are tense, your pet will pick up on this and mirror your attitude. An animal that is stressed will have a concerned look on his face. Dogs will flatten their ears down and tuck their tail between their legs. Cats often freeze up or run and hide.
Go into the shoot with confidence and a positive attitude and, while it’s important to bring energy, if you hype your pets up too much, they might become unruly, making their movements unpredictable. There’s a fine line between playful and frenetic.
9. Patience is key
As with children, you need to have a lot of patience when shooting with animals. You might not be able to get the exact shots you envision; however, it helps to think outside the box and be creative during the shoot. Sometimes, if you’re having fun with the animal and they are feeling relaxed and content, you’ll get great shots no matter what.
During your shoot, common sense should prevail. If you have just been playing or walking with a dog, for example, don’t try to get shots of the dog lying down and relaxing, as they may still have a lot of energy.
10. Know how to handle animals
If you’re shooting your own pets, you’ll know just how to handle them, but if you’re helping a friend or new client with pet photography, learn more about how to handle different animals prior to your shoot.
Whatever you do, don’t raise your voice or repeatedly gives the same commands expecting different results. This may scare the animal or confuse them, making it far less likely that they will do what you want. Animals will pick up on your mood, so getting frustrated will only make them anxious, and this shows in the eyes very easily. On the other hand, the more relaxed you are, the better the chances that you will get good photos.
11. Exposure tips for different fur colours
Before you start your shoot, consider the animal’s fur colour and how you may adapt your exposure settings to cater for this.
For light coloured pets, underexpose by 1 to 2 stops. For dark coloured pets overexpose by ones two stops. Shoot in the shade, or on an overcast day when lighting is very even. Then, underexpose by about two stops.
12. Focus on the eyes
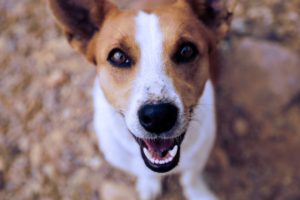
They say the eyes are the windows to the soul, and this is no less true with pets. Our pets’ eyes can be particularly expressive, especially dogs. When you frame your shot, be sure to focus on the eyes, no matter whether the animal is looking directly into the camera or not.
13. Watch for drool and dirt
Keep some wipes on hand, and be sure to watch out for excess drool and dirt. You can buy non-allergenic pet wipes from major supermarkets or pet stores. These are definitely worth having on hand. There’s nothing worse than getting the perfect shot, only to have it ruined by drool or dirt that you didn’t notice at the time.
14. Pet photography portraits
You might want to approach your pet portraits the same way as you would portraits of a human. The same principles apply when it comes to composition; focus on the eyes, and ensure you have a backdrop that is pleasing to the eye.
It is best to take your portraits at the end of your shoot when your animal is relaxed and calm and has used up all their energy.
15. Action shots
When shooting during action shots, aim to leave negative space in the direction I’ve implied movement. For example, if a dog is running from left to right, leave space on the right-hand side. Otherwise, keep the animal in action centred in the middle of the frame.
16. Be creative
While most pet photography is adorable, it can be easy to get stuck in a routine, producing the same shots is everybody else. Try to mix things up as best you can. Our pets experience all of the same emotions that we do; joy, happiness, playfulness, contemplation, or love, and all of this be shown on camera.
On top of this, every pet has their own distinct personality. Some pets are goofy, well others have unlimited energy. Others are a little bit cheeky. This can make each shoot interesting, as each pet will bring their own dynamic. It can be difficult to bring out the personality of animals that you don’t know, so ensure that you speak to the owner before shooting. This may even influence the props you choose to use, or the location of your shoot, so it’s important to understand is this before the shoot.
Like any kind of photography, it may take time to develop your skills until you can start to really get creative and come up with some more original shots but luckily, all pet photos are cute. It can help to start a Pinterest board or collection on Insta ground with your favourite photographers or simply images which inspire you. You can also take inspiration from the photos of people. The way we photographed pets is often quite similar to the way we photograph children, so try to draw inspiration from children’s photography and at adapting the techniques they have used.
Try to take some unique photos by experimenting with wide-angle lenses and interesting angles, and work from there.
17. Work your angles
Our final pet photography tip is to experiment with different angles. At first, get down on the animal’s level. Shooting them from above doesn’t do them justice, as it makes them appear smaller than they really are.
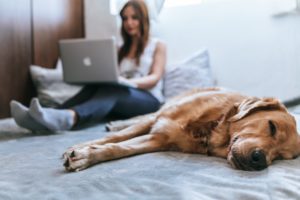
If you have pets of your own, think about how you interact with them. You don’t interact with them by standing above them. You’re usually sitting on the ground, or they may be sitting on the couch, or if they’re a little naughty, sitting on your bed! Their face may be quite close to yours and you usually have physical contact with them in some way. You could also show your pets interacting with each other.
Remember; the shot is about them. You want to show them in their world. Get down on your knees, sit down, or even lie on your belly so you are at the eye level or lower. From here, you are able to capture their expressions in greater detail.
With these pet photography tips and plenty of practice, you’ll be able to master pet photography before long, and have a blast doing it! Once you’ve got some beautiful pet photos, you can print them using Canvas Factory. Our canvas prints are a great way to decorate your home. If you’re shooting for others, our affordable, high-quality prints are the perfect gift to showcase your pet photography in stunning high-definition.


